LEFT ARMLeft Hand / LH
OPENS AWAY FROM YOU
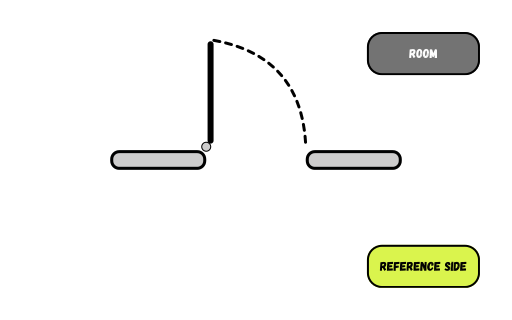
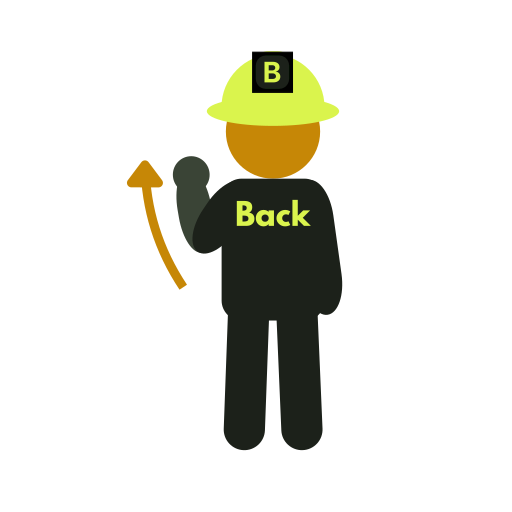
Left shoulder to the hinge jamb.
Swing your left arm forward like the door. That is LH = Left Hand.
DOOR HANDING LESSON
So the door does not hit you on the way out. Start with Left Hand and Right Hand, then use the same body trick to make Left Hand Reverse and Right Hand Reverse make sense.
START SIMPLE
Start with the two basic swings. Stand in the opening, face into the room, and let your arm act like the door.
Put the shoulder on the hinge side against the jamb. Swing that arm forward into the room, just like the door. Left arm means Left Hand. Right arm means Right Hand.
Swing your left arm forward like the door. That is LH = Left Hand.
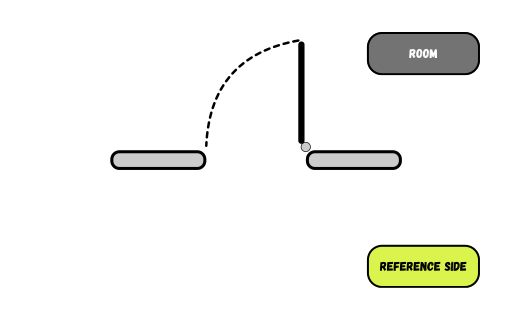
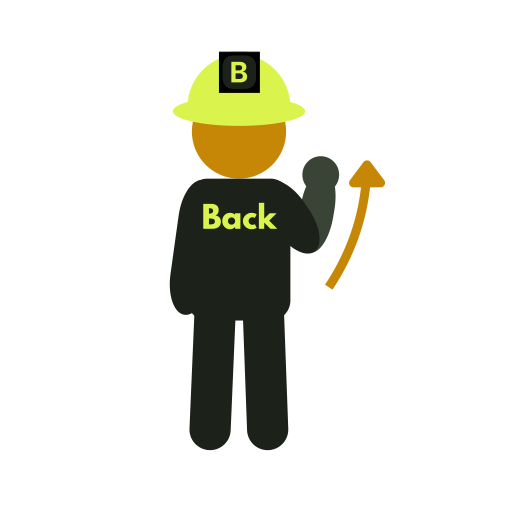
Swing your right arm forward like the door. That is RH = Right Hand.
THROW IT IN REVERSE
Step into the opening facing the room and put your shoulder against the hinge jamb. Stay in the same position. If the door opens back toward you, throw that same arm backward like the door.
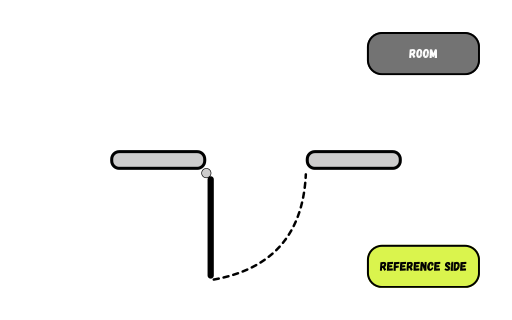
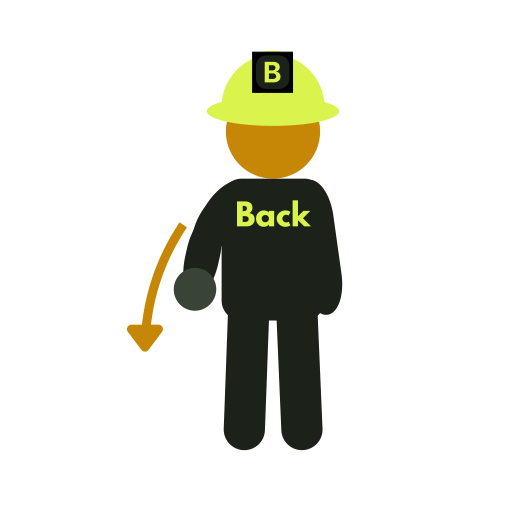
Throw your left arm backward like the door. That is LHR = Left Hand Reverse.
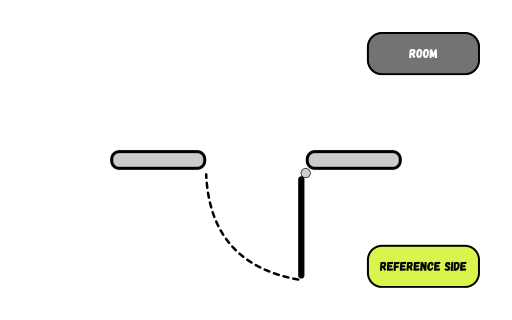
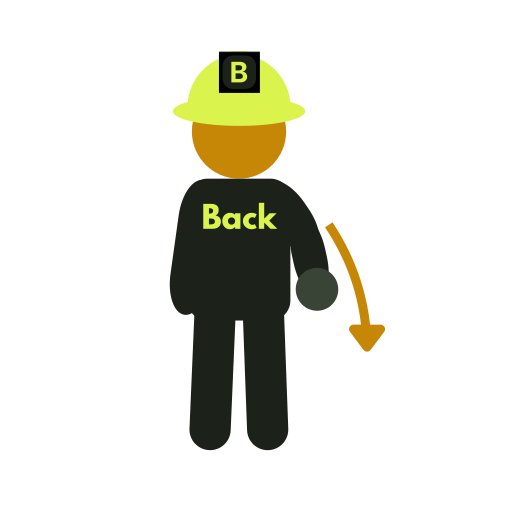
Throw your right arm backward like the door. That is RHR = Right Hand Reverse.
THE REFERENCE SIDE
The reference side gives everyone the same point of view. From that side, everyone can describe whether the door opens into the room or back out toward the reference side, so the door, hardware, and installation are all being described the same way.
For this lesson, think of the reference side as the side you approach the opening from. For a building entrance, that is usually the exterior or entrance side. For an office or room, that is usually the hallway side.
Hinge, strike, bevel, and factory prep need to match the intended swing.
The reference side helps identify keyed trim and handed locks, levers, or other hardware when the product requires it.
Some closers, pivots, exit devices, trim, and electrified hardware depend on the hand or installation side.
The supplier, hardware schedule, and installer all need to be describing the same opening from the same side.
Field rule: use the project door schedule and the manufacturer handing chart when ordering. Product-specific conventions can vary.
THE WHOLE METHOD
Face into the room and put your shoulder against the hinge jamb.
Forward into the room is the regular hand. Backward toward the reference side is Reverse.
Door opens away from you? Swing the hinge-side arm forward like the door.
Door opens toward you? Throw the hinge-side arm backward like the door.
SCOPE OF THIS LESSON
This lesson focuses on single swinging doors. Double doors, sliding doors, specialty openings, and other door conditions use different rules or project-specific conventions. Learn the four basic single-door handings first, then verify specialty openings against the project schedule and manufacturer information.
PRACTICE IT. THEN USE IT.
Use the trainer first for deliberate practice. When that feels easy, try the arcade under pressure, then take the same handing method into the field with Door Field Takeoff.
Training aid: This lesson uses the same common U.S. commercial door-handing convention as the BidSimp Door Handing Trainer and Arcade. Door and hardware conventions can vary by project, manufacturer, and specification. Always verify the project door schedule, hardware set, drawings, and supplier requirements before ordering. Terms & Disclaimer